One thing that I am not is a body man. I know my limitations, that’s why I hired Byron Valcourt, owner of Alternative Restorations, and his team to rebuild and eventually paint the complete 34 roadster body. His team is very meticulous and are doing a fantastic job fitting all the pieces back together. I look forward to my visits to his shop to see the progress unfolding. When the body is completed and ready for paint I plan on 3D laser scanning the roadster body which will provide everyone with a highly detailed and accurate 3 dimensional model of a 34 Ford Roadster body.
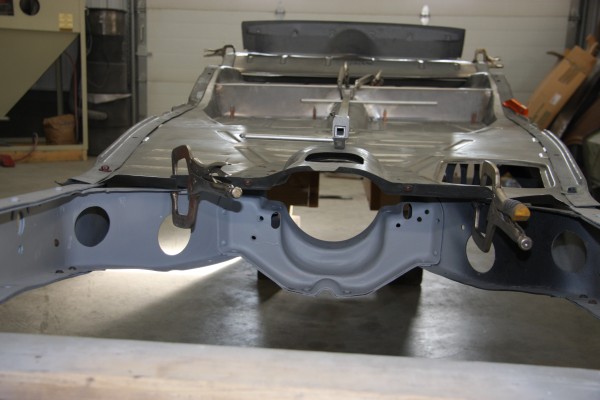
The frame is now restored but left in primer because they want to fit the floor pans and main body back on the frame. Once the body is fitted to the frame and we are completely satisfied with the fit of the body, including doors, they will remove the body and place it on a rotisserie for final prep and painting. The frame’s primer coat will be refreshed and then prepped for final painting. With the frame completed I will start assembling the mechanical components back onto the frame.
To date I have re-restored all of the mechanical components and they are waiting patiently in the garage to be rejoined with the frame. Once I have the frame back I will be detailing the reassemble of the mechanical components to the frame, stay tuned…
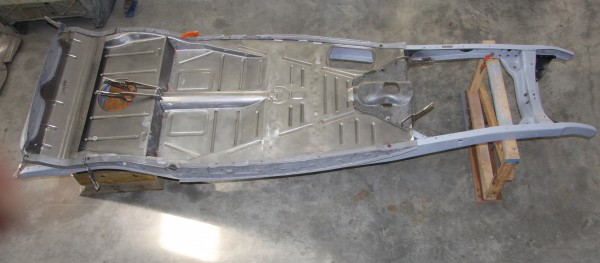
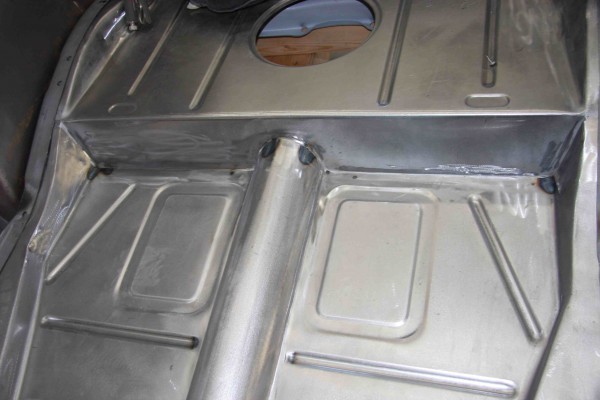
With the driver and passenger floor pan in place they are making sure the transmission cover fits properly. We also decided to replace both sub-rails which were purchased from Steve’s Auto Restoration. They also fit rather nicely but the guys at Alternative Restorations needed to make a few changes so they mimic the original sub-rails. I will detail what they mean in the next few weeks and keep adding to this post.
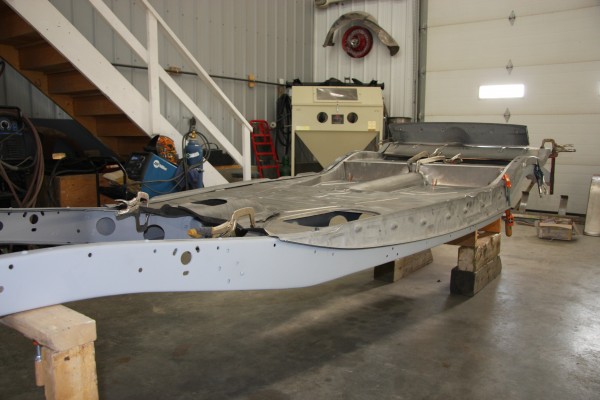
The side view shows the driver’s side frame sub-rail in place. If you look up at the top center of this picture you can see my damaged rear fender and wheel hanging on the wall. I must say that it adds a nice touch of original art work to Byron’s shop and its a reminder of what was and now what’s soon to be…

Most of the floor pans are in place and there still is some fitting to do with the rear sections of the floor pans.
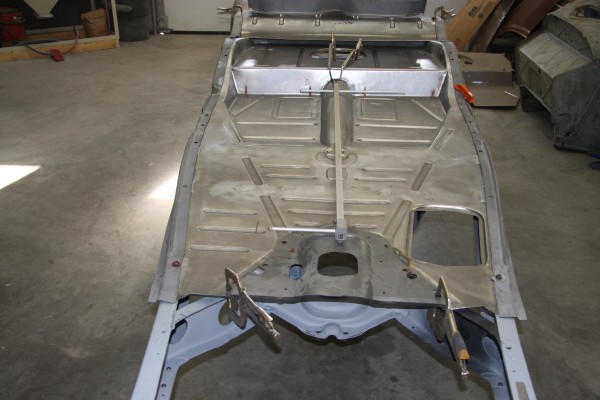
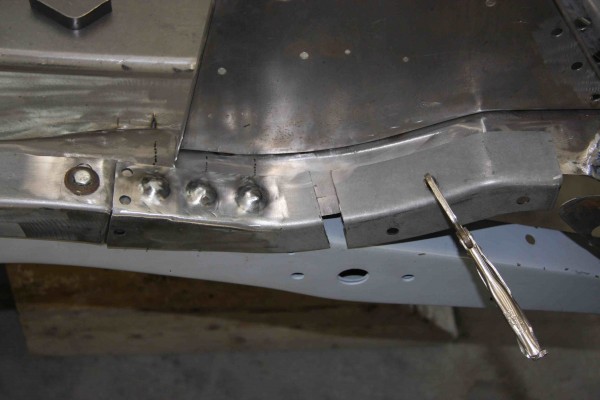
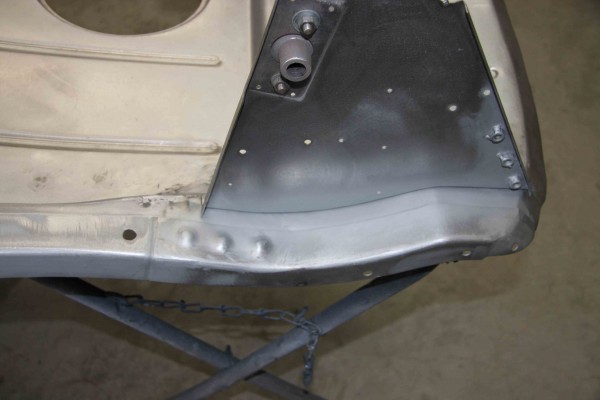
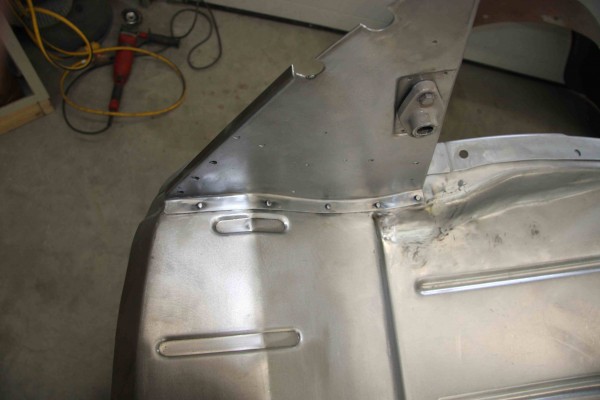
The replacement sub-rails were close to the original. However, they did need to be modified to match the original floor pan pattern. For example, if you look where the sub-rail lies on top of the outer edge of the floor the reproduction sub-rail did not have the indentations to match the floor pans and they do now! The original sub-rails matched this pattern of the floor pan as seen in the next photo that I forgot to take! I will take it on the next trip back to the shop.
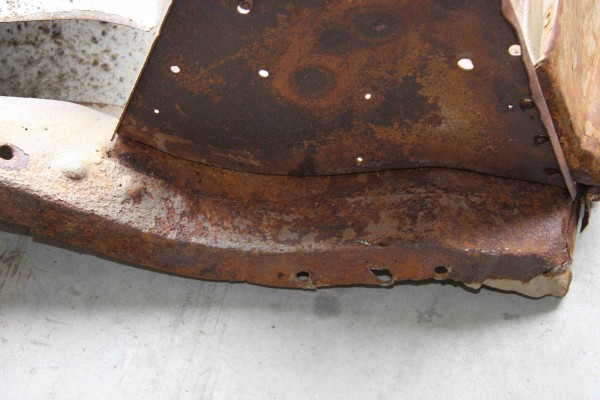
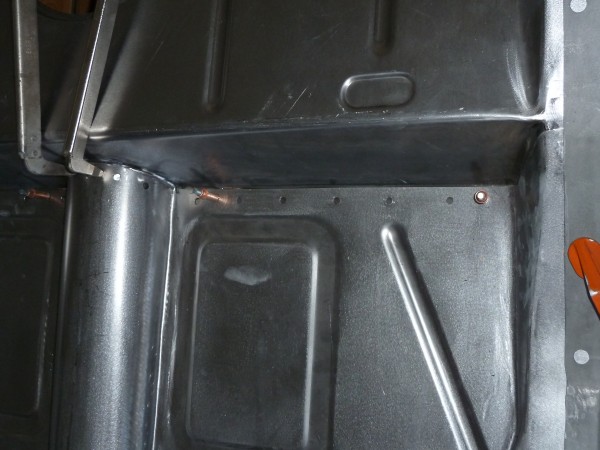
Here is the photo that I forgot to take and you can see the profile that was recreated in the above photo, into the reproduction sub-rail. In the photo above and of course this is the passenger side, damn. I meant to take the drivers side but you can see what I’m pointing out. Also you can see the repair weld on the top of the sub-rail and this is one of the many reasons that I decided to completely rebuild the car. There were many areas on the floor pans that were damage and one area was twisted at the sub-rail which could have been from the accident. Other areas of the body once stripped showed excessive bondo very poor repair welds and generally not a very good restoration. Whomever restored this car in the late 70’s must have been related to Micheal Angelo because the bondo body sculpting was absolutely incredibility straight and in some areas of the body the bondo was a 1/2″ thick. I must say that the car looked great and mechanically wasn’t that bad.
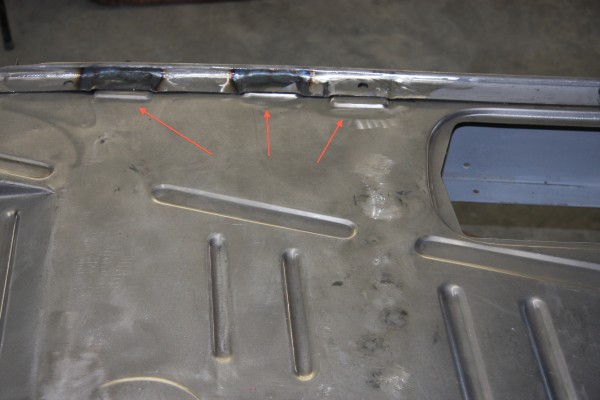
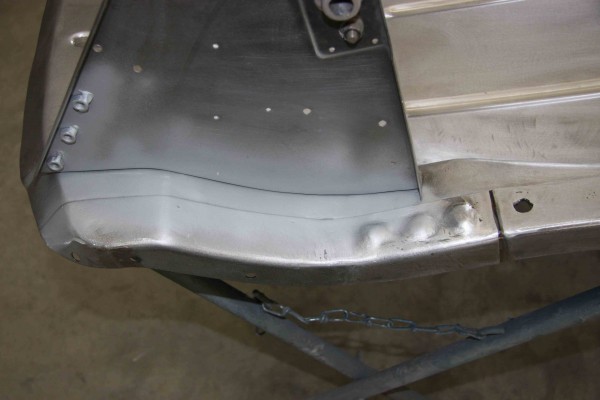
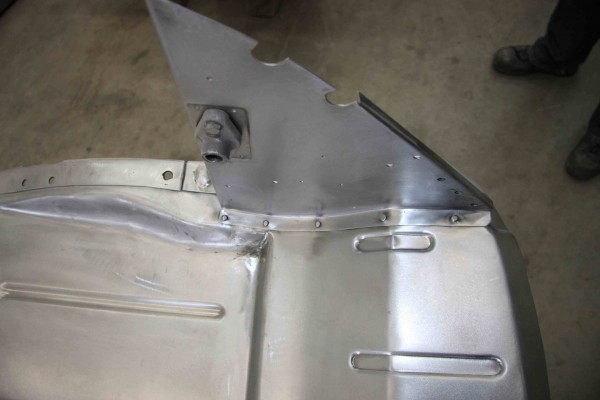
Also the tail pieces of the reproduction sub-rail did not fit properly at the rear of the frame and had to be modified, and the three bumps on the top of the sub-rail were not on the reproduction ones and had to be added as they were on the original sub-rail.
This is the original profile of the drivers side rear sub-rail tail piece and you can see the three bumps that were recreated.
The guys at Alternative Restorations have done a great job of completing the final fit of the rear frame sub-rail tail piece drivers side,
and final fit of the frame sub-rail tail piece on the passenger side.
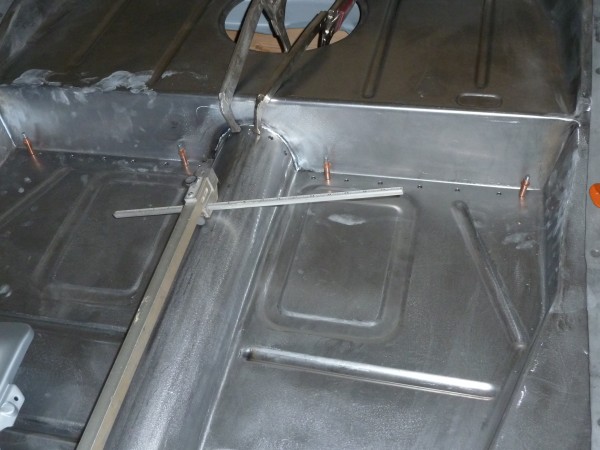
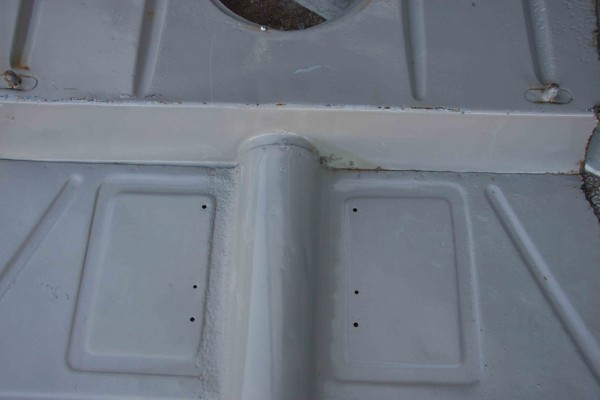
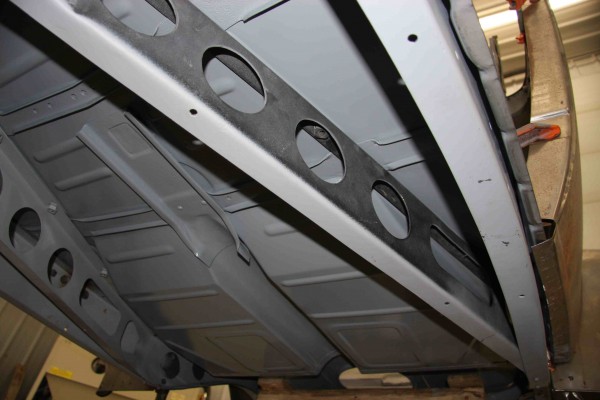
Here you can see the Cleco pins holding the center floor panels and drive shaft tunnel to the trunk floor pan. On the original floor pans the center floor and drive shaft tunnel overlap the trunk floor pan and were then spot welded together. For those of you who do not know the Cleco pins are basically spring-loaded, removable pop rivets that allow you to hold two pieces of sheet metal together in proper alignment for drilling, riveting or spot welding. This allows you to test-fit the panels before they’re permanently attached to your vehicle.
This is a better photo of the center floor pan and drive shaft tunnel overlapping the trunk floor pan.
The completed floor pan with it spot welded in place.
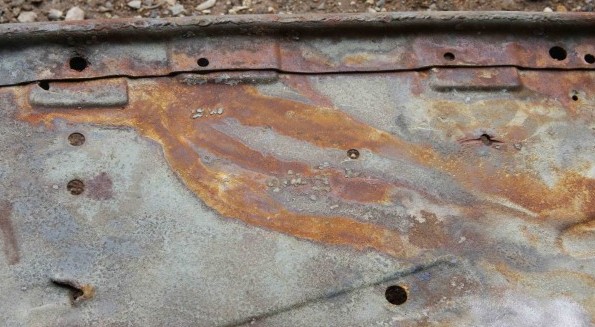
In this photo of the original floor pan you can see where the floor pan overlapped the trunk floor pan.
If you look at the trunk floor pan on the reproduction floor pan the four strengthening ribs are in the correct position however they are a completely different profile from the original floor pan.
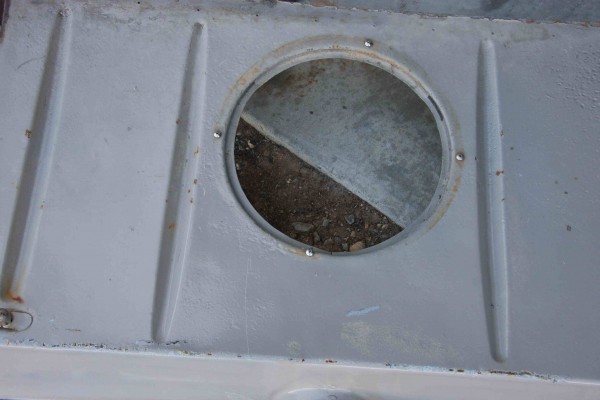
On the original trunk floor pan the strengthening ribs are more ovoid.
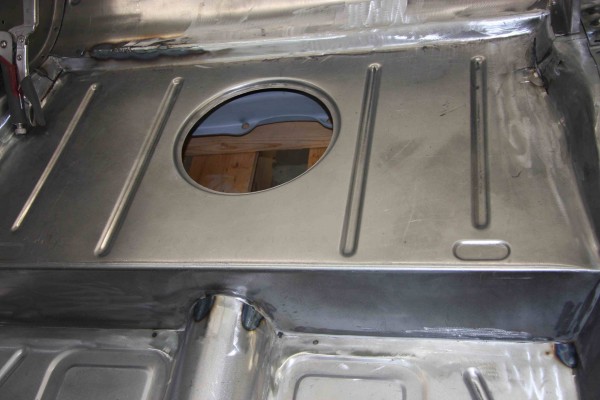
The lower inner trunk triangular rumble seat bracket has now been fitted and permanently riveted to the rear trunk floor they also serve as mounting points for the rumble seat hinges. I should note that we still need to cut the rectangular hole for the gas tank sending unit access cover.
and both sides are now in place.
With the sub-floor now completely assembled it was removed from the frame and Byron put a coat of Dupont DTM epoxy on the bottom of the sub-floor this will help preserve it until the final priming and painting of the body.
Comments on this entry are closed.
This is a great website with excellent pictures of the restoration.
I am doing a 34 5w and this site is very helpful. Thanks!
Glad to hear it Dan. I’m currently stalled a bit while waiting for my painter to finish up the body. Stay tuned!
Excellent work Steve! I’m buliding a 34 roadster myself in Australia & I’m struggling to find any help or infomation on how every thing goes together, what your doing with your photos & story is “Gold” this would make a great book.